Labs 4a, 4b, 4i, 4j ~ DNA
Purpose
Lab 4a - To make two different solutions. These solutions are 10mm of 5mole NaCl and 100mm of 10micro mole TRIS and 1micro mole of EDTA.
Lab 4b - To observe the DNA by spooling it from the solution.
Lab 4i - To observe DNA before and after its isolation.
Lab 4j - Pour agarose gel over DNA and then observe the DNA in the gel.
Materials
|
Lab 4a
balance, analytical balance, tabletop milligram weigh paper, 7.6X7.6 cm weigh boat 3.5"X3.5" lab scoops sodium chloride tubes 15 mL, cappped tube racks for 15 mL tubes TRIS EDTA, disodium salt bottle, 125 mL graduated cylinder, 100 mL pH paper, wide/narrow-range Hydrochloric acid Sodium hydroxide glass rods |
Lab 4b
beakers, 50 mL DNA, salmon testes pipet, 2 mL pipet pump, blue micropipet, P-1000 mircopipet tips for P-1000 Ethanol, 95% glass rods tubes, 15 mL capped tube racks for 15 mL tubes permanent lab marker pens plastic beaker, 1L tripour |
Lab 4i
TAE buffer concentrate, 40X beakers, 600 mL agarose balance, tabletop milligram weigh boat, 3.5"X3.5" lab scoops media bottle, 250 mL permenent lab marker glaases, saftey gel box, horizontal, for agarose gels beakers, 50 mL |
Lab 4j
gel box, horizantal, for aragose gels tube rack for 1.7mL tubes DNA samples (from previous labs) micropipet, P-10 prepared aragose gels (from Lab 4h) reaction tubes,1.7 mL yeast DNA micropipet, P-100 TAE buffer concentrate, 40X permanent lab marker pens gel loading dye, 10X micro[pipet tips for p-10 |
Procedure
Lab 4a
Part I: Preparing 5M of NaCL
1. Use molarity formula to figure out that you need to add 2.92 grams of NaCl to a conical tube.
2. Add 10 ml of water to the conical tube.
3. Vertex and label. Keep for future use.
Part II: Preparing TE Buffer
1. Add 0.1576 grams TRIS and 0.037224 grams of EDTA to a beaker.
2. Add 80 ml of water to the mixture.
3. Add HCI to the solution until the pH level is between 7.5 and 8.5.
4. Add water until the solution is at 100 ml.
5. Label and store for later use.
Lab 4b
Part I: ???
1. Put 1 mL Salmon Sperm DNA and 1 mL TE into a beaker
2. Add 5M NaCl to the beaker
3. Add 4 mL ETOH to beaker. Do Not mix.
4. Use a glass stir rod and spool out the DNA
5. Place the spooled DNA into a conical tube and add 2 mL TE
Lab 4i
Part I: ???
1. Add 0.4g agarose powder and QS TAE to 100 mL
2. Heat solution until the agarose has dissolved
3. Let solution cool and then pour it into the gel box. Then put the combs into the gel.
4. Let it set
Lab 4j
Part I: ???
1. Cover the gel in TAE
2. Add 20 uL DNA and 4 mL of 6x loading dye into a tube
3. Centrifuge solution
4. Using a micropipet, load the solution into the gel
5. Apply electric charge to gel for approximately 45 minutes
6. Stain the gel with Ethidium Bromide
7. Rinse off and observe
Data Results
After completing the procedure and getting ready to analyze the DNA in the gel, Dr. LB discovered that the DNA did not appear. This was a blow to us because it seems like we completed the lab for nothing. But all was not lost as we attempted to figure out what went wrong.
Update
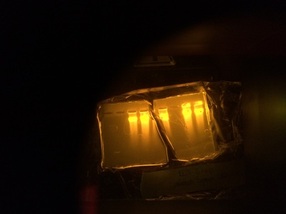
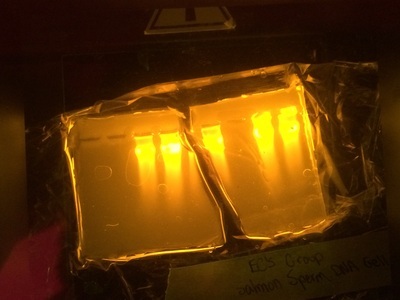
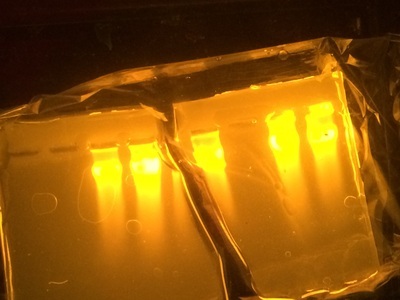
Dr. LB was able to salvage the expirement and so we remade our gels. Here's what the gels looked like when the DNA appeared.
Update
Dr. LB was able to salvage the expirement and so we remade our gels. Here's what the gels looked like when the DNA appeared.
|
|
|
Data Analysis
As a class, we came up with a few reasons on why the DNA did not appear.
These reasons are.
1. Staining overnight caused the DNA to diffuse out.
2. Denatured DNA
3. Did not load the DNA properly into the gel.
4. The stain was bad.
5. Dye not resuspended before loading in gel.
Likelihood of these possibilities happening.
1. Unlikely because the DNA is too small to diffuse out.
2. Unlikely because it is the stain's purpose.
3. Unlikely because that would mean every single group did the lab wrong.
4. Most likely because overtime the chemicals in the stain could have gone bad.
5. Unlikely because that would mean every single group did the lab wrong.
Update
After Dr. LB remade the stain and then cast the DNA into the gel, the DNA appeared. It seemed that our stain had gone bad and prevented the DNA from appearing.
Reflection
After completing the procedure and getting ready to analyze the DNA in the gel, Dr. LB discovered that the DNA did not appear. We racked our brains trying to figure out what caused the DNA to not appear. Our reasons are stated above.
Update
After Dr. LB remade the stain and then cast the DNA into the gel, the DNA appeared. It seemed that our stain had gone bad and prevented the DNA from appearing.
1. What did you like/find interesting?
I really liked being able to see the DNA. I always thought that DNA would be way to small to see and always imagined it as bases and helices. It was kind of a shock to see the salmon sperm DNA as a real thing, just because it really altered my belief on how DNA always has helices. This made me want to be able to look at DNA under a microscope to see how elaborate and complex it is.
2. How did you and your partner collaborate?
My group worked well together, even if we sometimes got lost or were a little behind other groups. I liked that we were all into the lab and wanted to see the DNA. Something that we could improve upon would be focus. Sometimes, we got carried away and did not make any progress on the lab. Or, sometimes, we would leave somebody behind. Overall, I think there was definitely room for improvement, but we did well enough to complete the lab successfully.
3. What would you do differently next time?
Time management wold definitely be something to work on. Distributing work, following instructions and listening are others, but from a group standpoint we could really work on time management. From an experimental standpoint, I wish that the stain had worked properly the first time. It was almost disappointingly bad when the first gels did not turn out, but thankfully we were able to salvage the lab and make it worthwhile.
